Preparing For Your Move with These Simple Tips

Moving is stressful. Whether your things are going to a storage unit or moving to your new home, there are plenty of points to consider before you do, such as how you are going to transport your supplies. Picking the right packaging supplies for your items is one of the single most important things to do to protect your belongings and ensure a safe and smooth move wherever you need to be.

What Moving Supplies You May Need

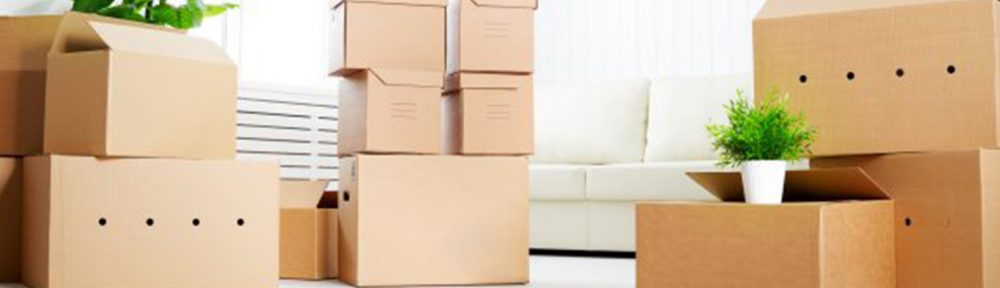
Boxes: A staple to any move is putting your things into boxes. A sturdy cardboard box will guard your items and prevent valuable, fragile belongings from getting banged up and broken. Ensure that you have plenty of different sizes from which to choose. There are also specialized boxes that allow you to quickly and easily pack things like dishes and clothes to save time and money later. Remember to use new boxes, as old boxes may have suffered from the last move, becoming flimsy and susceptible to splitting.

Packing Paper/Peanuts: Once you have your boxes filled, you should focus on filling them with paper or peanuts. These are designed to fill out any unused space left in the box and absorb shock from bumps during transport. If anything shifts while in storage, the items won’t have anywhere to fall.

Bubble/Shrink Wrap: More than just a stress relief, bubble wrap can be used to wrap up large, fragile items such as televisions and computers. For mirrors and other large, flat items, you can use shrink wrap to protect them from scrapes and scratches.

Packing Tape: Tape is a necessity if you plan on sealing your newly filled boxes at all. Add stability to your boxes by doubling up on tape to the bottom and sides, as well as any weak points. If your items are heavy, definitely ensure that your boxes are well sealed so that the bottoms do not fall out.

Markers: Now that you have packed, protected, and sealed your boxes, you should mark them with a marker to remember what exactly is inside. You can write a broad term such as ‘kitchen,’ or you can be very specific and list the types of items that are packed within. Unpacking then becomes a very simple process.

Mattress Covers: These handy wraps are akin to big, thick, plastic bags that you slide over your bed to defend against dirt, grease, and scraping. They are also a necessity for when you are keeping mattresses in storage, and it protects against the build-up of dust and mites.

Furniture Covers: Similar to mattress covers, furniture covers are designed to prevent dust and bugs from making their way into your expensive furniture. It also allows the cloth to breathe, meaning humidity doesn’t get trapped against your couch cushions and get moldy. When retrieving your furniture from storage, it’s as simple as taking off the covers and enjoying your couch as fresh as when you put it away.

Estimate How Many Packaging Supplies You Need

Save yourself some money and a trip to the supply store by planning out roughly how many materials you will need to complete your move. There are numerous websites online that can do this for you, but it is all dependent on the size of your home and the amount of stuff you want to move. A three bedroom home can take as many as 16 large and extra-large boxes, 18 medium boxes, 20 small boxes, six rolls of tape, and bubble wrap to fill it all out. Knowing what to have and an estimate of the packaging supplies you will need can save you time, money, and stress in the long haul.

How to Build Moving Boxes for Packing

There are many different handy skills that people can learn over a period of time. These skills can be very useful in a lot of situations, including learning how to build moving cardboard boxes for a relocation. Even though the initial building may take a little time to complete accurately, people tend to get a lot swifter when they have completed quite a few. Whatever the case, it is very important that people learn how to build them quickly so that they can help to speed up the packing process.

That said, here are the 4 steps that people can follow to build cardboard boxes correctly.

Step #1 – Gather all of the supplies that will be needed to build the cardboard box. Fortunately, there are only 3 items that will be required to do this kind of job correctly, and they are listed as follows.

– Tape Gun
– Tape
– Flat Moving box

Step #2 – Pick up the flat moving box, and then begin to fold it into the shape of a cube. If the person has any difficulty with completing this step, the instructions for folding it in this manner is normally written on the box. In general, this process is usually very simple to do because it only requires standing the flat moving box in an upright position and then opening each of the corners of the box out as instructed.

– Once part of building a moving box is complete, the person will then fold each of the flaps across one another very carefully. The lower flaps of the moving box should be folded 1st and then the upper flaps should be folded 2nd.

– Based on how the boxes are designed, the person may be able to secure the flaps by simply tucking them at the end. This tucking process is great for making sure the flaps are secured in a manner that will make it difficult for them to open again.

Step #3 – After the flaps are in the correct position, the next step is to position the box upright. Simply stated, the base of the box (flaps that have been closed) should be positioned upwards toward the ceilings if the person is on the inside of a home or facility.

– The tape gun should be used to tape the bottom of the box so that it remains closed permanently.
– Make sure the tape covers the entire flap on each side of the box and then break off the excess tape accordingly. Most people can judge how far the tape needs to travel down before it i cut off.

-The actions provided above should be done over and over again until the bottom of the box is strong enough to handle small or large items to be placed in them for storage.

Step #4 – Pack Items in the Box for Moving day

Once all of the items have been placed in the box (books, tablets, ink pens, bowls, electronics, etc.), all the person has to do is to seal the top of the box. Sealing the top of the box will only require using the tape gun again to apply the tape. The tape can be applied liberal enough to cover the top of the box so that it will not open again without being cut.

Delivering candies the optimal way

Have you ever wanted to send someone a package of chocolate, candies or edible and was scared of it melting inside the package or that it wouldn’t reach the person in a good state? It is very common to blow up a gift just by forgetting that chocolate can easily melt in hot weather.

There are also many options for packages that many people don’t account for besides the traditional chocolate box. You can send candies in buckets, jars, candy boxes and even treat bags, those famous plastic cones that they give at kids’ birthday parties.

As for the candies themselves, you have to think and research about the possible reactions your chosen edible can have on the weather, excessive movement and if it can spoil. Some types of candy can expire in a quick manner or get a bad taste if wet.

Types of Candies

Caramel, if too much time passes, can get extremely hard. What is called “hard candy,” like lollipops, for example, can last indefinitely but will get sticky and clumped together if humidity gets to it. Candy boxes are not the best option for caramel.

Chocolate lasts for months, only having a bit of discoloration and softening after too much time has passed, but candies with nuts in them can get spoiled very quickly.

Lastly, a good practice is to account for five months the time you should start doubting the quality of your candies. Besides that, they are still edible as they are primarily made of sugar, so they’ll just get softer as a result.

For hard candy, because they can last longer, will not need too much attention spent on their package, just make sure it can’t get easily wet, so a glass bottle or a tin is the way to go with them.

As for chocolate, those old, classic candy boxes are still a good alternative for them, as you can’t fight back against hot weather. Chocolate boxes usually have a pre-made template for you to put chocolates there and they won’t move around the box. That is important if your candy can break into pieces or if there is a decoration in it.

Shipping

While shipping, keeping the nature of the candy in mind is as important as when deciding the package. Chocolate and caramel, for example, can melt while shipping during hot days.

In the case of fragile candies, it is a good practice to use what is called overnight or one-day shipping. These have better chances of delivering your products in a much better state than other means of transportation.

It is important to keep in mind that candies can get into a bad state if kept inside a hot truck in the weekend. Because of that, remember to always ship them early in the week. That way they won’t get stuck during the weekend, and you’ll also secure that the delivery was fast.

The Food and Drug Administration (FDA) advises to put them in the refrigerator or places with a cold temperature for them to return to the optimal state, especially if shipping to hot places.

For packaging, they advise to place a cold source inside an insulated container and place the candy on top. After that, close the container, and you’re ready to ship it.

Make Cardboard Boxes In Simple Steps

Everyone has multiple uses with cardboard boxes in our day to day life as we use it to pack things, present gifts, decorate with boxes, etc. Interestingly, almost every consumer product is coming in some types of boxes similar to the cardboard box. Making cardboard box is not a hefty job, or it doesn’t need any specific knowledge, but I must say it is an interesting job. If you have some creative ideas, you can earn out of it by making the boxes in different styles and designs and sell it to product manufacturers or small shop owners. See the steps how you can make a cardboard in a simpler way.

Choose the Cardboard

It should be according to the use, and for simple uses, it is better to use the side of a cereal box to make small boxes. When it comes to sturdier projects, corrugated cardboard is better, and use cardstock or scrapbooking paper for larger and decorative boxes. Few things to be noted that 1/4th of the length of cardboard becomes the side of a square box and the width of cardboard becomes the height, top, and bottom of the box. For instance, if there is a cardboard of 12″ x 9″ size, it can be converted into 3″ sides with 6″ height.

Decorate Yourself

It is much easier to decorate before starting the cutting or folding the cardboard. You can simply use a designer wrapping paper with ½” more than cardboard size and glue it on one side the cardboard. While making the box, fold it like the cardboard side with wrapping paper forms the exterior of the box.

Make a Flap at One End of the Cardboard

Make “glue flap” at one edge (length-wise edges) to hold the four sides while completing the box making. The flap can be of 2″ wide for larger boxes, and it can be ¼” for small boxes.

Draw the Outline

Divide the remaining part of length into four equal sections using a ruler and pencil to get a square box. But, you can change it the division proportion to a different dimension to get a rectangular box. For instance, if you wanted to make a box of length 4″ and 3″, you have to take dimension with an initial division of 4″, then 3″, continued by 4″, and finally 3″.

Make the Edges Easier to Fold

To make easier folding at the edges, make a hard press at the edges of each section using a ruler. If thick materials like corrugated cardboards are used, get the help of a utility knife to make a soft cut.

Fold the Sides

Make a bend to inward at the edges and release it; this can make sure an easy fold later.

Draw Flaps for Top and Bottom of Box

Take the width of each side of the designed box and divide it by half. Extend the line top and bottom of the initial draw with that measurement. For instance, if the width of the designed box is 4″, then divide it by half, and the result is 2″. Extend 2″ height lines of sides at the bottom and top to make them top and bottom flaps.

Cut each of the Flaps

Cut the flaps on top and bottom until it meets the height lines of sides. This adds four flaps each on top and bottom of the initial drawing.

Fold the Sides and Stick together

Bend all the four sides and stick it along the narrow glue flap using sticky tape or glue and make the structure.

Fold and Stick the Base

Tuck the flaps of opposite sides together like one overlap the other and stick together using glue or sticky tape.

Tuck the Top Flaps

You can tuck and stick top flaps like the base if you are shipping things with products inside or using as decorative cardboard boxes. Otherwise, keep the flaps just tucked for easy opening.

Your Cardboard Box is Ready